How to Set Up a Tent in 10 Minutes (Even Solo)
Setting up a tent in 10 minutes is genuinely doable. Most people take 40 because they've never done it before their first campsite arrival, or the last time they tried was in the dark, hungry, with the instructions somewhere at the bottom of the bag.
That's not a gear problem. It's a practice problem. And it's the most fixable thing on this entire list.
Whether you just picked up your first tent from the tent range at Basin Sports or you've been camping for years and the setup still takes longer than it should, this guide walks through the full picture: choosing your spot, raising the tent, staking it down, tensioning the fly, and the stuff nobody else covers like setting up solo, setting up in the rain, and what to do when the ground isn't cooperating.
Why Most People Take 40 Minutes (And How to Fix That)
The reason is almost never the tent. It's that the first attempt happens at the campsite. You've just driven for four hours. The sun is going down. The poles look like a pile of spaghetti. Nobody in your group has actually done this before and everyone has an opinion.
Tent setup is a sequence. Once you know your specific tent's sequence, your hands start doing it without much thinking. Before that point, every step is a decision and decisions take time. The fix is to pitch the tent once at home before the trip. Not as practice. Just to know the sequence. Ten minutes in the backyard saves thirty at the campsite.
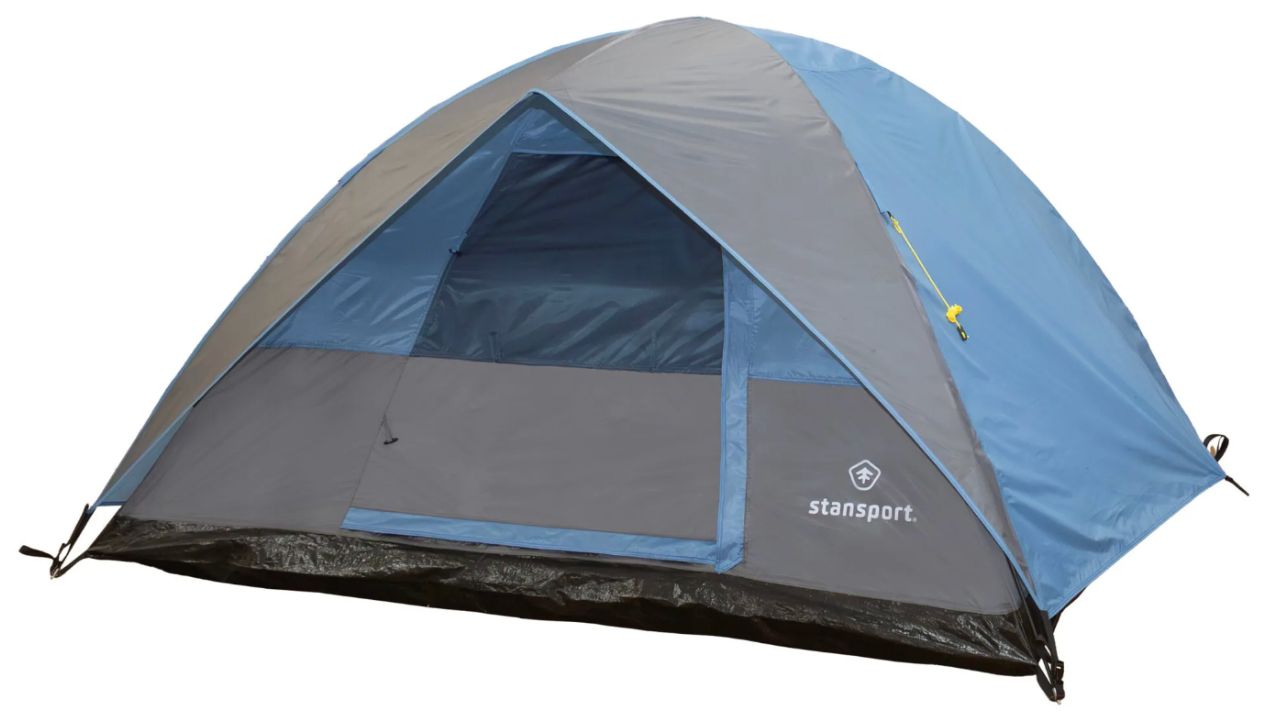
Every tent is a little different. The steps below cover the large majority of standard dome tents, which is what most campers are working with. Pop-ups, cabin tents, and non-freestanding backpacking shelters have variations covered further down.
We once watched a group spend 45 minutes on a 3-person dome tent. They had three poles left over at the end. The tent still went up. Sort of.
Before You Touch a Single Pole: The 3-Minute Gear Check
Three minutes of checking at the car saves twenty minutes of backtracking. Missing stakes are one of the most forgotten camping items, right alongside can openers and spare batteries. You only discover they're gone when you're a mile from the trailhead or an hour from any hardware store.
Lay everything out flat and confirm you have all of these:
• Tent body, poles, and stakes, count them against the bag's instructions
• Rainfly, the outer waterproof layer that goes over the tent body
• Ground cloth or footprint if you're using one
• Mallet or hammer for hard ground
• Headlamp if sunset is anywhere in the next two hours
• Repair tape and a spare stake or two
If anything is missing, now is the time to know. Not after you've committed to a campsite an hour away from civilization.
How to Choose Your Campsite (It Affects Everything)
The spot you choose matters more than almost any other decision in tent setup. A perfectly pitched tent on the wrong ground is still a rough night. This part takes two minutes and it's worth every second.
What you're looking for is flat, slightly elevated ground that won't pool water if it rains overnight. Flat looks one way at 6pm and a very different way at midnight when rain comes in sideways. If the ground around a potential spot shows ring marks or compacted soil from previous pooling, keep moving.
Look up before you look down. Dead branches overhead, called widow-makers, are a real hazard that most beginners never think to check. Also scan for ant hills, exposed roots, and rocks just under the surface. You won't feel them when you're choosing the spot. You'll feel every single one at 3am.
• Flat and slightly elevated, never in a natural low point
• Good drainage in all directions, check how rain would run off
• No widow-makers or dead branches overhead
• At least 200 feet from water sources
• Orient the smallest end of the tent toward the prevailing wind
• Door away from wind direction for smoke control and less flapping
• Existing campsites over fresh ground wherever possible
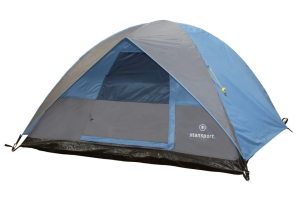
How to Set Up a Tent Step by Step: The 10-Minute Method
These eight steps cover standard dome tents. The sequence is consistent enough across most two- and three-season tents that you can use this as your baseline and adjust from there.
Step 1: Lay Out the Footprint (1 min)
A footprint is a cut-down ground cloth that sits under the tent floor, protecting it from abrasion and moisture. Lay it flat with no edge sticking out beyond where the tent floor will sit. Any exposed edge channels rainwater straight under you. You don't have to use a footprint on every trip, but on rocky or wet ground it's a genuine difference-maker over the life of the tent.
Step 2: Unfold the Tent Body (1 min)
Pull the tent body out and lay it flat on the footprint, door facing the direction you want. Most tents have a marked corner to indicate orientation. Straighten everything out before you touch a pole. Starting with a tangled tent body is where a lot of those extra thirty minutes come from.
Step 3: Assemble the Poles (2 min)
Lay all pole sections out end to end and connect them by sliding each piece into the next. Every connection needs to be fully seated before you move on. A half-connected pole bends under load and can snap. Color-coded poles match to color-coded grommets or sleeves on the tent. If yours aren't color-coded, a strip of colored tape on the pole ends and matching tape on the attachment points is a five-minute prep that prevents twenty minutes of confusion at the campsite.
Step 4: Thread or Clip the Poles Into the Tent (1 min)
Poles either thread through fabric sleeves or clip onto attachment points along the outside of the tent body. Clip systems are faster and slightly easier. Sleeve systems sit a bit closer to the tent and can offer better weather performance. For a standard two-pole dome, each pole runs diagonally across the tent body from corner to corner. Don't push the ends into the corner grommets yet. Get both poles crossed loosely before you commit to any corner.
Step 5: Raise the Tent (1 min)
Push each pole end into its corner grommet. The tent rises as you do this. Work from one pole to the other, alternating corners so the tension builds evenly across the tent body. A dome that goes up lopsided usually means one pole end missed its grommet. Check the corners first before you do anything else.
Step 6: Stake Down All Corners (2 min)
Start with one corner, pull the fabric taut, and push the stake in at a 45-degree angle with the hook pointing away from the tent. Work your way around alternating corners, keeping even tension as you go. Staking one corner too tightly before doing the others makes the remaining corners fight you. On hard ground, use a mallet or the flat edge of a rock. The stakes need to be fully in, not half-buried.
Step 7: Attach the Rainfly (1 min)
Drape the fly over the tent body and attach the corner tabs to the pole ends or corner stakes. Then pull it taut all the way around. Anywhere the fly sags and touches the inner tent, moisture transfers straight through. That’s not a heavy rain problem. That’s a light dew problem. Check that the door on the fly lines up with the door on the tent body before you secure anything.
Step 8: Tension the Fly and Check Guylines (1 min)
Tighten the fly so seams on the fly line up with the poles and seams on the tent body. If seams don't align, readjust tension until they do. This tells you the fly is properly seated. Then check your guylines. Most campers skip these unless it’s obviously windy. Don’t. Guylines extend from loops on the rainfly and stake out to the ground a few feet from the tent wall. They keep the fly extended and taut in the wind. Attach them to the guy points on the fly, run them out at an angle, and push a stake in at 45 degrees. Recheck fly tension after the first thirty minutes because most fly fabric relaxes slightly once it’s been under load.
Check the fly zippers before you attach the fly, not after. A stuck zipper in a rainstorm at 2am is a special kind of misery that could have been avoided in ten seconds at home.
The 10-Minute Breakdown: How Long Each Step Actually Takes
This is the part most guides skip. The title says 10 minutes. Here's exactly where those 10 minutes go, and which steps you can compress with practice.
Step: Pick and clear your spot
Time: ~2 min
What You're Doing: Flat ground, no widow-makers, check drainage
Step: Lay footprint and tent body
Time: ~1 min
What You're Doing: Orient door, straighten fabric before poles
Step: Assemble and insert poles
Time: ~3 min
What You're Doing: Connect sections, clip or thread into tent
Step: Raise the tent
Time: ~1 min
What You're Doing: Push pole ends into corner grommets
Step: Stake down all corners
Time: ~2 min
What You're Doing: 45-degree angle, even tension all the way round
Step: Attach and tension rainfly
Time: ~1 min
What You're Doing: Drape, clip corners, pull taut, check seams align
Step: Total
Time: ~10 min
What You're Doing: Done. Go eat something.
The two steps that shrink the most with practice are pole assembly and staking. Both are pure muscle memory after a few runs. The site selection time stays roughly the same because it depends on the campsite, not your skill level.
How to Set Up a Tent Alone: The Solo Sequence
Solo tent setup is something most guides completely ignore. But it’s a real scenario and the challenge is specific: nobody is holding a corner while you run to the other side. The tent body slides around every time you move.
The fix is simple. Before you assemble a single pole, stake two diagonal corners of the tent body loosely into the ground. Just enough to stop it moving. Those two stakes act as your second pair of hands. Then assemble the poles, thread or clip them in, raise the tent, and finish staking the remaining corners. It changes the whole experience.
Freestanding dome tents are the easiest to set up solo. Non-freestanding tents, the kind that rely entirely on stakes to hold their shape, are much harder alone because you’re trying to tension fabric and drive stakes at the same time. If you camp solo regularly, that distinction is worth knowing before you buy.
• Stake two opposite corners loosely before touching any poles
• Use tent bags, boots, or rocks to hold corners while you work
• Clip-pole systems are faster solo than sleeve-pole systems
• Freestanding tents are the right call for solo camping
• Practice the full solo sequence once at home until it’s automatic
Setting Up in the Rain Without Everything Getting Soaked
Rain changes the sequence but it doesn’t make setup impossible. The goal is to keep the inside of the tent dry while you’re building it, which means getting the fly on as early as possible rather than saving it for last.
If your tent supports a fly-first pitch, use it. Stake the fly to the ground first, then build the tent body underneath it like an umbrella. Not all tents allow this, but many modern backpacking and three-season tents are designed with this scenario in mind. Check your tent’s specific instructions before you find yourself in the rain wondering if it’s an option.
For tents that need the body up first, work fast and keep the tent body in its bag until you’re ready to unfold it. Have the rainfly out and ready the moment the body is up. Two minutes or less from the body raised to fly on is the target.
• Use fly-first pitch if your tent supports it
• Keep the tent body in the bag until the last possible second
• Orient the smallest end of the tent into the wind before you start
• Tuck all footprint edges under the tent floor so none stick out
• Have a small microfiber towel or sponge for any moisture that sneaks in
• Stake the fly down first in heavy wind, even before the body is fully up
Tent Setup on Tricky Ground: Sand, Rocks, and Hard Soil
Most camping guides assume you’re setting up on soft, cooperative earth. Reality is often different. Hard-packed clay, sand, rocky ground, and wet soil all change how you stake and how secure your tent will be overnight.
The table below covers the five terrain situations that cause the most trouble and the fix for each one.
Ground Type: Hard/rocky
The Problem: Stakes won't go in
The Fix: Use a mallet; anchor with large rocks over stake loops
Ground Type: Sandy
The Problem: Stakes pull out in wind
The Fix: Longer stakes at steeper angle; X-pattern or deadman anchors
Ground Type: Wet/soft soil
The Problem: Stakes sink or shift overnight
The Fix: Wider stakes; check and retighten in the morning
Ground Type: Roots/uneven
The Problem: Tent floor lumpy and uneven
The Fix: Clear debris; use sleeping pad to bridge gaps
Ground Type: Compacted clay
The Problem: Very hard to penetrate
The Fix: Soak ground lightly; use a nail to pre-punch holes for stakes
One technique worth knowing for sand: deadman anchors. Dig a hole about a foot deep, run your guyline around a buried stick or rock, and fill the hole back in. It sounds excessive until the wind picks up at 11pm and your neighbor’s tent rolls through your site.
Guylines: The Step Most People Skip Until It’s Windy
Guylines are the thin cords that extend from loops on your rainfly and stake out to the ground a few feet from the tent walls. Most campers treat them as optional gear that only matters in serious weather. That’s not quite right.
A well-tensioned fly with guylines extends further from the tent body, creates better ventilation, and moves water away from the base of the tent more effectively. Even in calm conditions, a fly with guylines set out properly is drier and quieter than one without. You’ll notice the difference on any night with dew.
Attaching them is quick. Find the guy-out points on your fly, usually loops midway up the tent wall directly over a pole. Run the cord from the loop outward at roughly 45 degrees from the tent and stake it into the ground. Tension it until the fly is taut but not straining. Recheck tension after the fly gets wet because most materials stretch slightly under moisture.
• Attach guylines to the guy-out points on the fly, not random loops
• Run each line outward at roughly 45 degrees from the tent body
• Stake at 45 degrees with the hook pointing away from the tent
• Even tension on all lines, don’t over-tighten one side
• Recheck after rain or heavy dew, wet fly fabric relaxes
How Long Does Each Tent Type Take to Set Up?
This is the question nobody answers directly. Setup time varies a lot by tent type, and knowing roughly what to expect before you buy or borrow a tent is genuinely useful. The times below are realistic estimates for someone who has pitched their tent at least once before.
Tent Type: Dome (2-person)
Approx. Setup Time: 8–10 minutes
Solo Friendly?: Yes
Best For: Most camping, backpacking
Tent Type: Dome (family)
Approx. Setup Time: 12–18 minutes
Solo Friendly?: Manageable
Best For: Car camping with kids
Tent Type: Cabin tent
Approx. Setup Time: 20–30 minutes
Solo Friendly?: Difficult
Best For: Base camping, max comfort
Tent Type: Backpacking tent
Approx. Setup Time: 5–8 minutes
Solo Friendly?: Yes
Best For: Thru-hiking, ultralight
Tent Type: Pop-up tent
Approx. Setup Time: Under 1 minute
Solo Friendly?: Yes
Best For: Festivals, casual car camping
Tent Type: Non-freestanding
Approx. Setup Time: 10–15 minutes
Solo Friendly?: Tricky
Best For: Ultralight backpacking
Pop-ups go up in seconds. Taking them down is the plot twist. The fold-down sequence is non-obvious and fighting it in a campground with people watching is its own kind of suffering. Watch a video of the fold sequence before your first trip. Worth every minute. If you’re unsure which type fits your camping style, the tent range at Basin Sports covers all of these across different budgets.
7 Mistakes That Ruin Your First Night
These aren’t catastrophic on their own. More than one at once, though, and you’re in for a long night.
1. Setting up a brand new tent for the first time at the campsite. Do it at home first. Every tent, every trip.
2. Pitching in a natural low point. Looks flat at 6pm. It looks like a shallow pond at midnight when it rains.
3. Letting the rainfly sag and touch the tent body. Moisture transfers on contact. Tension it properly.
4. Skipping stakes on a freestanding tent. An empty freestanding tent in the wind moves like a tumbleweed. Always stake.
5. Ignoring guylines until it’s already windy. Set them from the start. Five extra minutes at setup, zero stress at midnight.
6. Letting footprint edges stick out beyond the tent floor. Every exposed edge funnels rainwater straight under you.
7. Stuffing a wet tent into its bag for long-term storage. That smell gets permanent fast. Dry it fully at home before it goes away.
How to Pack the Tent Up Without Ruining It
How you pack the tent at the end of the trip matters as much as how you pitched it. This is the step most people rush because they’re tired and ready to leave. It’s also the step that determines whether the tent lasts two seasons or ten.
A wet tent stuffed into its bag equals mildew within days. The smell gets into the fabric and it doesn’t come back out. If it’s wet when you break camp, roll it loosely into any bag and dry it completely at home before long-term storage. Don’t compress it tightly into the original stuff sack while it’s damp.
When it’s fully dry, store it loosely rather than in the original compressed form. Repeated tight folding creases the waterproof coating over time. Many experienced campers store their tent in a large mesh bag or a slightly bigger bag than the original, just to reduce compression stress on the fabric.
• Shake debris out of the tent body before packing
• Let the tent fully air dry before any long-term storage
• Store loosely, not compressed in the original stuff sack
• Check poles for cracks or bent sections after every trip
• Wipe poles clean and dry to prevent corrosion at the joints
• Check zippers for grit and clean with a soft brush if needed
Tent setup is a skill that goes from confusing to automatic with about two or three real repetitions. The poles click into place the same way every time. The stakes go in at the same angle. The fly tensions the same way. Your hands learn it faster than your brain does.
The only gap between someone who does this in ten minutes and someone who takes forty is that one of them has done it before. The campsite is not where you want your first attempt. All the tents and caming gear you need are at Basin Sports. The practice is up to you.
So here’s the thing worth sitting with before your next trip: when did you last actually unpack your tent at home and run through the sequence? Because whatever your honest answer is, that’s exactly how prepared you’ll be on Saturday night when the light is going.
FAQs
1. Do I need a footprint under my tent?
Not strictly required, but strongly recommended if you’re camping on rocky, rough, or wet ground. A footprint protects the tent floor from abrasion and moisture and extends the life of the tent significantly. Just make sure no edge sticks out beyond the tent floor, which would channel rain underneath.
2. How do I set up a tent in the wind?
Stake two corners immediately before you do anything else. Wind makes the tent body act like a kite if there’s nothing holding it down. Once two corners are staked, assemble and insert the poles, raise the tent, and stake the remaining corners. Set guylines out before the fly goes on, not after.
3. Can one person set up a two-person tent?
Yes, especially with a freestanding dome tent. The key is staking two diagonal corners of the tent body before you assemble any poles. Those stakes act as your second pair of hands. Without them, the tent body slides around while you’re threading poles and the whole process doubles in time.
4. What’s the difference between a footprint and a tarp?
A footprint is cut to match your specific tent’s floor dimensions, so nothing extends beyond the perimeter. A generic tarp often has material sticking out, which catches and funnels rainwater underneath. If you’re using a tarp as a ground cloth, fold all edges under the tent floor so nothing is exposed.
5. Why does my tent feel damp inside even when it hasn’t rained?
Two likely causes. First, the rainfly is sagging and touching the tent body. Anywhere the fly contacts the inner tent, moisture transfers through. Tension the fly until it’s taut and the seams align. Second, it could be condensation from breathing and body heat with insufficient ventilation. Crack a vent or slightly loosen the fly at the base to let air circulate.
6. How long should tent stakes be?
Standard 6-inch stakes work for most firm ground. Soft or sandy ground benefits from longer stakes, 8-10 inches, driven at a steeper angle or crossed in an X pattern. Rocky ground may require staking around rocks or weighting guy-out loops with large stones instead.